Electra Glide Road King Maintenance Video Clip
In this Electra Glide Road King maintenance video you'll learn how to drain fluids, remove the oil filter, and how to remove inspection cover, and a bit more...
The full length DVD has far better video and audio quality, and it shows you how to fully maintain your bike without all the headaches and money aches.
The bike builder in this Electra Glide Road King maintenance video is a graduate of the Motorcycle Mechanics Institute (MMI), and graduated from Harley Davidson University with a masters rating. In addition, he is a Harley Davidson Lead Mechanic.
Electra Glide Road King Maintenance Tips:
Now through this video you might hear me refer to the primary and what that is, that is this area right here, this is your primary chain case; this holds fluid, it's where your clutched is and its where it delivers the power from the engine to the transmission; so what we're going to do in this section is; we're going to move the drain plugs for the engine the primary and the transmission and we're going to remove the oil filter, that way we can let all those drain and continue on with the service and put them all back in once we're done.
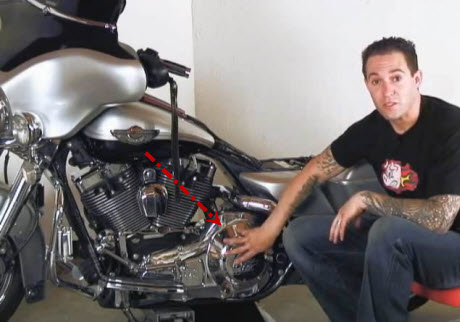
So if you want to take a look at the primary chain case; which is right here, this is your drain plug it's either going to be right here or directly underneath this spot; it's a T-forty or torx 40, is going to be holding that in.
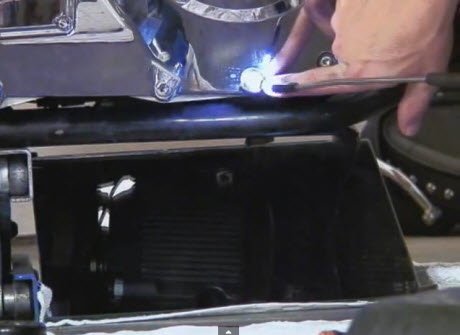
Then if you want to go underneath, I have set up a mirror here; there's going to be a 5/8 inch plug that is right here on the oil pan and that's your engine oil:
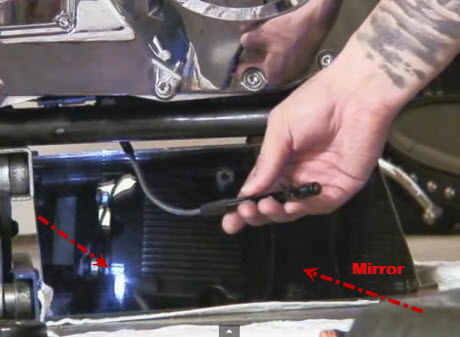
And then you'll have another 5/8 inch plug that's all the way in the back, it's identical to it; it's right here, that's your transmission plug:
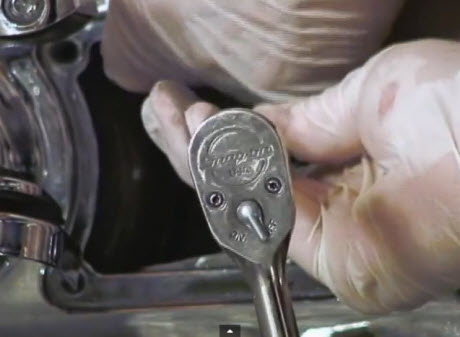
So I'm going to remove those, let those drain and I'm going to remove the oil filter and then we can start with the rest of the service.
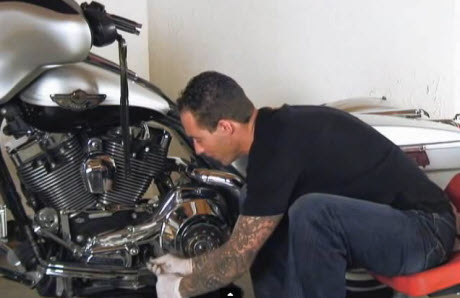
Now that we have all our fluid draining I'm just going to start pulling the covers off, I'm going to take the clutch cover and the primary chain inspection cover off so we can inspect it, [Inspection cover].
Alright now with both of these covers remove we can get to take a look inside the primary; as you look right in this area you'll find your primary chain and right below that is you going to find a primary chain tensioner, it's like a little shoe and there's a nice 16th in that where you can loosen or tighten to adjust it up and down.
So if we loosen it you can move the shoe un and down so you can adjust the primary chain; now you want to be sure you check your manual for a specific free-play you have in your chain, you going to want about 5/8, so you want to make sure in your manual whether that's hot or cold and what model it's for.
So you can put a ruler in here to find out your inspect or not, I go by feel:
That's right where we want to be. Lock it down and you're in good shape. Next what we going to do is we're going to loosen up the clutch cable, we're going to do our clutch cable adjustment and then lubricate our clutch cable. If you want to build your own motorcycle, these bike building videos are the best and only comprehensive chopper building videos (DVD) on the market, bar none. Guaranteed.
