A Comprehensive Motorcycle Painting Guide!

The history of motorcycle painting and customization is quite interesting. Let me ask you a question.
Where and when did the craze to customize motorcycles evolve?
From Orange County (New York - not California, by the way) Choppers to West Coast Choppers, the wave of custom-built, custom-painted choppers with intricate and individual paint jobs has been rising - and there is no sign of it cresting soon.
Custom motorcycle painting had humble beginnings, prior
to the highly stylized, finely tuned airbrushed choppers of today.
The very first Harley, introduced in 1903, was pretty much a racing bicycle with a motor.

Spare parts were available as of 1909. Motorcycles kept their bike-like appearance until the release of the teardrop-style tank in 1925.
The reliable flathead engine, a 45 cubic inch, V-twin, was introduced in 1929. Harley Davidson set its own style with beautifully detailed bikes and well-made logos. The 1936 El (nicknamed the Knucklehead) was set off beautifully in a deep dusty, shiny blue with immaculate yellow-cream accents and the Harley logo on the tank.
Before the Second World War, chopping up your own bike was really the only way to accomplish a faster ride - speed equipment simply was not available yet on the mass market yet.
Motorcycle painting was not something these infamous bikers had in mind:
Mid-century riders looking for a faster machine found that removing
and cutting down the metal on their bikes afforded more horsepower and a
more efficient machine.
Anything that could go, went - fenders,
lighting, and more. The result was a chopped-up motorcycle, or a "chopper" (or
bobber. A Bobber was the first chopper because often the builder would remove
the front fender and shorten the rear fender which is called 'bobbing' the
fender).
With this individual customization for speed came a trend toward custom,
personalized parts and custom motorcycle painting.
Riders were stereotyped as more risky and edgy than the mainstream, and their individuality began to show in their choppers.
Customization increased in the late sixties and early seventies, leading to the introduction of the cruiser in the form of the Harley-Davidson FX 1200 Super Glide. The Low Rider and Cafe Racer were released in 1977, and the Harley Owners Group, affectionately known as the HOG, was started in 1983. You are about to embark on an exciting adventure.
Custom painting your motorcycle, whether you have it done by a professional or do it yourself, is one of the premier ways to display art, status, personality, and any statement you wish in a very unique and diversified forum.
Motorcycle Preparation and Painting!
Tips on Motorcycle Preparation For Painting and Airbrushing:
Are you sure you want to do this?
Custom painting your motorcycle from primer to final clear coat is not, by any means, an easy or inexpensive proposition. Many, many of those who have done it successfully, however, purport to be very pleased with themselves and the final result.
Now is the time to decide what you really want to do. If you want the best, the ultimate, the second-to-none, get with a professional - no bones about it. If you decide to have a professional do the job, make sure you see his work in person. Talk to other bikers with great paint jobs. Check your local HOG chapter for recommendations.
Having a professional paint your bike is a serious investment in time and money.
You have an in-between option as well, and this manual will help you with it - just skip the parts that do not relate. This second option is to simply airbrush your custom graphics or lettering on top of the stock paint. Mask off the areas you want to protect, paint your design, then clear coat with urethane. To go with this option, make sure your bike is ultra clean and completely dry, then refer to Step 3. For those of you going all the way from primer to perfection, read on.
Choose your style.
Flames or leopard spots? Skulls or angels? Red on black or black on yellow? Are you going to be daring and go multi-tone or single color base? The possibilities are endless, and the important thing is to choose what you want before you start.
Make a list of what is important to you, and translate it to your design. How does it feel to ride your own newly painted, sleek chopper? What does it look like in your mind? Take that image and put it to a plan - on paper.
It does not have to be perfect or even what you end up with. Just start the process, and your ideas will grow. If you already have stickers or stencils, use them to help you build your pattern. Keep working on your paper plan until you have a solid idea of what you want your chopper to look like, then move on to selecting your paint and tools.
Pick your poison.
Most riders want a deep, fluid look to their paint job - as if the paint were still wet. This manual will guide you toward achieving this quality and depth. Look at your plan of what you want your chopper to look like. Many professionals use urethane or enamel. You can, too, but keep in mind that many of these materials are not forgiving of mistakes.
One of the most challenging parts of painting your own bike is preventing drips, and a drip on an enamel job can take days or weeks to sand out because of the drying time involved. When using enamel, plan for three to five coats.
Powder coating is another popular option, enabling you to spray a fine powder over the bike and "bake" it on, creating a smooth, glossy finish.
Lacquer dries very quickly (minutes), and each coat combines with the previous look for a smooth finish with no layers to worry about.
Whatever paint you select, choose the same brand for the color, clear coat, and thinner. Check with your local professionals and suppliers for suggestions on paint brands and quality. As of this writing, the most common recommendation among the professionals is an acrylic urethane.
Preparation:Painting your motorcycle is all about preparation. The painting is the easy part compared to the careful planning and preparation you will need to do. You will have to plan for environmental factors that could affect your paint. Choose an environment large enough to house a good-sized painting booth where you can regulate the air temperature, air flow, and traffic in and out.
Your shop needs to be seventy degrees or warmer to ensure that your products work as they are supposed to. Clear coat, for example, can look cloudy after it has been applied if the temperature is below seventy. Check the labels of your products for specific information about temperature, use, disposal, and more. Get your gear.
You are going to need, give or take here and there, the following painting supplies to paint your chopper.
Buy or Build a Paint Booth For Motorcycle Airbrushing and Painting!
Build A Paint Booth:

Paint booths serve to keep the use of hazardous (high fume, flammable, explosive, etc.) materials in a confined area while providing better ventilation and particle for the safety of the painter.
The concept is simple; the application and benefits are not. One of the most important things to keep in mind is that you are working with flammable or explosive materials. As the vapors build up in the atmosphere around you, they become more combustible, so it is crucial that you have the proper equipment to disperse them.
You can find a copy of NFPA 33: Standard for Spray Application Using Flammable or Combustible Materials, 1995 Edition and related publications at www.nfpa.org.
A basic paint booth is a simple box with air intake on one end and filtered exhaust at the other. Clean air passes over the painter at a rate that keeps the paint spray and fumes from settling on and around him/her, the parts, and the shop floor.
The dirty air is carried through the filter, which catches (ideally) at least 90 percent of the paint overs-pray.

If you're going to invest in a paint booth, look for booths made of galvanized steel that are built in compliance with OSHA 1910 AND NFPA 33. Some resources for purchasing paint booths include Tools USA (www.paint-booths.com) and Global Finishing Solutions (www.globalfinishing.com).
Build A Paint Booth!
If you prefer to build your own paint booth, it is possible. There is more to it than just the right filters and fan, however. Check local and national safety regulations and contact your insurance company for guidelines.
Start with the exhaust fan. Check the regulations for the electrical and mechanical conformance ratings your fan needs to meet. Your fan needs to exhaust to the outside, preferably through a window or other opening.
Build a vented box to protect the fan. Make it about one foot deep and cut a place in the front for a filter. You want something that lets air through but keeps paint particles away from the fan. Remember that you are going to need to change the filter on a regular basis.
While some hobbyists use simple furnace filters that are available in grocery or super stores, you would be better served by using a filter designed for maximum protection. What you need to look for is an industrial air filter, or specifically an "intake panel filter." these are available through companies like FiltersRx (www.filtersrx.com) and AirGuard (www.airguard.com).
The filter has to capture and hold the paint spray. If it does not do this, paint will accumulate. As it builds up and decays, it will heat up and eventually could start a fire - much like mulch or compost.
A major key to fire safety when painting is to avoid buildup and compression of the paint or anything containing paint material such as the filter. Never dispose of paint waste via conventional curbside pickup or dumpster. Both of these disposal methods use compression.
Never press or compress used filters when disposing of them, and use smaller metal trash containers (up to 55 gallons) for paint waste disposal.

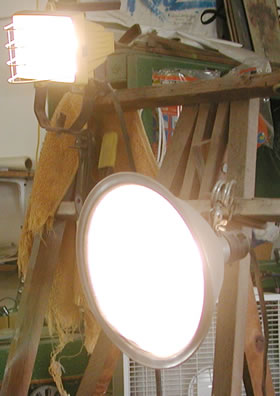
Good Lighting Is Crucial To Painting Your Bike!
You need good lighting inside and outside the paint booth. Take a look at the professional paint booth in figure 2.3. The professional booths contain at least a half dozen of the fluorescents you see there.
Good lighting enables you to see what you are doing, spot imperfections and dust more easily, and visualize the depth of your paint layers in the design process.
In addition to good paint booth lighting, you want to have good fluorescent figures or at least two or three strong spot lighting fixtures like those in the photos below. You can even use portable floodlights for a good, strong light.

Types Of Airbrushes For Motorcycle Painting!
Airbrushes offer the most diversity, from wide coverage to meticulous detail. Airbrushes are available in single or double-action styles. With a single action, the air and paint are delivered at the same time, and you have to stop painting to adjust the amount of paint.
Additionally, the air controlling the paint is adjusted externally. With a double action, you can control both the air and the width of the line you are painting, moving from the thick base of a flame, for example, to the thin tip in one stroke.
The double action is recommended for use on choppers. Select an airbrush that can handle jar-sized paint. Gravity-fed, side-fed, and bottom-fed models are available.
Gravity fed airbrushes deliver paint into the instrument from a cup on top or over the nozzle. Thicker paints can be used, and there is less clogging with this model. It is also faster to clean and quicker to change color.
Side-fed airbrushes use air to pull paint from a side-mounted color cup or bottle. The side or siphon-fed airbrush offers slower spraying and good visibility.
Check the range of line sizes your airbrush offers, called its range. The more range your airbrush has, the more continuity of motion and efficiency you will have. More range means changing airbrush needles less.
Move the trigger up and down to control the air and back and forth to control the size of the line. Clean your airbrush after each use to ensure that it runs smoothly every time.

Here are the best spray guns for painting motorcycles and automobiles: Vaper 19220 HVLP Triple Set-Up Spray Gun Kit - 4 Piece
Cleaning and Disassembly Before Painting Your Bike
Cleaning Is One Of THE Most Important Steps: First Comes: Disassembly.
There are two schools of thought on whether or not you should remove the parts you want to paint before you clean and paint.
When it comes to safety, thoroughness, and quality, however, there is only one choice: disassemble. Disassembling allows you to get up close and personal with each part, and it is a lot easier to cover every inch with paint.
Before you disassemble, take some good, clear photographs of your chopper. This serves two purposes: you will have a vision of the assembled bike and you will have some fantastic before photos to reference. Remove all the painted parts from your bike.
Make sure you get the ignition module cover and headlight bowl in addition to the oil tank and fenders. Place smaller parts in Ziploc bags and carefully mark the part, exactly where it came from, and your motorcycle model.
Note the direction of each piece, wire flow, part situation, and any other relevant fact, however small, in your notebook. Time spent here will be rewarded with greater time saved later when you are trying to reassemble.
Identifying the finish:
The old paint on your motorcycle will affect the new finish, and it must be cleaned off. How do you know what kind of paint it is? Here is one of the ways to determine what type of paint is on your vehicle:
Get a white rag and apply lacquer thinner to it. Rub the thinner on a non-visible are of the part. If the paint shows up on the cloth, you're dealing with an air-dried paint. If the paint does not rub off, you have a powder coated, urethane, or other heat or reaction dried paint.
Clean mean and sand grand.
Other than planning, this is the most critical part of the entire process. Clean every part of your chopper that you can reach. Use a hot alkaline cleaner or paint stripper for steel painted parts.
You must make sure that every bit of oil or solvent is gone and the metal is squeaky clean. Any imperfections will be magnified in your new paint job, and they will not necessarily show up until after one or more coats.
Talk to others who have painted their bikes to see what they use and where they get it. Check with your local auto supply store. Call a good chopper painter - check with your local motorcycle or parts store for recommendations - and see if they will share some tips with you.
For metals other than steel, use cleaners recommended for each metal type to preserve the integrity of the metal surface. Palmolive dish-washing liquid is popular for cleaning. Blast cleaning is also very effective at removing old paint and rust, but it is critical that you clean carefully afterwards to remove every particle of residue. The smallest bit of oil can ruin a paint job.
Phosphatizing is another way to prepare your bike for painting. This process lays down a coating of iron or zinc that bonds to steel, creating a flawless base to work with.
Fork Legs:
Clean thoroughly, removing every bit of grease, dirt, and residue. Use 320 grip to sand, then step up to 600 grit and sand thoroughly again. Use steel wool pads in medium and #0000 grit to finish up. Apply paint thinner to a clean rag and thoroughly clean the fork legs with the paint thinner. Apply clear coat, wait for it to dry, and apply another clear coat.
Aluminum:
Although you can use sandpaper and liquid polish, buffing with jeweler's rouge will give you the best opportunity for a smooth, satiny finish. Add more rouge every thirty seconds, and move steadily and evenly over the surface.
The buffing action creates warmth on the surface; using even strokes will maintain the surface temperature, helping you to create an evenly blended, polished surface. Use an open-weave buffer with the next finer polish using the same guidelines if you want a mirrored finish.
Buffing compounds are very effective for removing light scratches on aluminum and then bringing it to a shine. Use White Rouge buffing compound to polish and shine the aluminum.
Here is a chart with guidelines for what chemical to use for certain parts. This is only a guideline - talk to others and check with your motorcycle's manufacturer for more detailed information.
Cleaning Type For Parts:
- Engine parts, gas tank, aluminum parts, air cleaner cover, front fork lowers, expansion chamber: Use a xhemical stripper
- Aluminum and steel: Chemical stripper
- Plastic: Rubbing alcohol, Windex, Armor All
- Frame:
- Steel: Chemical stripper
- Nuts and Bolts: Wire brush
Chemical Stripping:
Chemical stripping involves applying a chemical, usually in liquid or paste form, waiting a few minutes, then scraping off paint and residue loosened by the chemical stripper. Most chemical strippers do not address rust, and some are not effective on some primers.
Never use a chemical stripper on urethane plastic. You are going to need a real respirator that protects you against fumes and vapors, your eye protection gear, coveralls, and gloves to use a chemical stripper. It is easy to work with, but at a price.
Blasting:
Sand, bead, and soda blasting are all effective against old paint. Sand blasting is the harshest method of the three: it can remove rust, but it can also pit or deform metal.
While bead blasting is more gentle (it uses plastic beads instead of sand), it does not work very well on rust. Soda blasting is the most gentle of the three methods. It is an environmentally safe alternative to using solvent.
Soda creates a finer, gentler abrasion than sand, and can effectively remove paint and other coatings without damaging the metal underneath.

Motorcycle Parts Sanding - Sand With A Plan!
There are many different ways to sand a vehicle, and as many opinions as there are ways. The basic goal is to effectively sand excess material off the metal and smooth out imperfections without damaging the metal. A small imperfection due to overzealous sanding can lead to big problems in your final paint job. Here is a rundown of some of the more popular methods of sanding and their appropriate uses.
Parts And Sanding Type:
- Engine parts, gas tank, aluminum parts, air cleaner cover, front fork lowers, expansion chamber:
- Hand sanding, 2000 grit
- Aluminum and steel: Sandpaper, jeweler's and white rouge (Be very careful to sand lightly so as not to create dips or impressions in the aluminum)
- Plastic: Always test first
- Frame: Hand sanding
- Steel: 320 grit Sandpaper
- Nuts and Bolts:
How To Paint Your Motorcycle In 5 Steps!
How To Paint, Part 1:
- Choose the paint.
While, in the past, the amateur's friend was lacquer with its fast drying time, newer acrylic urethanes are more forgiving and easier to use than ever for an ultra-professional looking paint job. Many of the professionals recommend acrylic urethane for a beautiful finish. If, however, you decide to go with lacquer, see the chart below for suggestions on what you can use for various parts.
- Frame, silver painted pieces: Dupont Chromacolor, Basecoat/Clear coat.
- Engine: Dupli-color Laquer T178 Grey (NOT silver).
- Tank and other painted parts: Choose lacquer, enamel, or powder paint.
How To Paint Your Chopper or Motorcycle Part 2:
- Test the paint.
Find a hidden part on one of the painted pieces to do this test on: put a small amount of lacquer thinner on the paint. If the paint reacts, this means it is an air-dried paint, and you will need to fully strip it in order to ensure that your new paint job holds. Your goal is to sand all your pieces to a smooth finish.
How To Paint Your Chopper or Motorcycle Part 3:
- Prime.
Start by priming each piece carefully. Set the piece on a stand so that none of the painted parts are touching a surface.

After priming, you will need to sand and clean before painting the base coat...

How To Paint Your Chopper or Motorcycle Part 4:
- Base Coat - the first paint
When you are working with a comprehensive coat like the base coat, always paint in the paint booth. Make sure you are wearing a respirator, coveralls, gloves, and eye protection.
Using a high-volume, low-pressure (HVLP) spray gun is recommended for broad, even coverage. This gives you a very fine spray for a very thin coat.
Using a smaller fluid tip (1.3 for example but check your spray gun manual for the manufacturer's recommendation), set the fan width and turn the material knob about 2.5 turns. Check your manual for the correct air pressure and set it accordingly. Using your aluminum flashing, hold the gun about eight inches away and pull the trigger.

You may find it helpful to use your non-spraying hand to support the elbow of the arm you are spraying with. Even though you are spraying a relatively large and smooth volume of paint with the spray gun, a steady hand will help you keep the look smooth and glossy without inconsistencies.
Move left to right (or right to left if you are left-handed) in easy, smooth motions. Start spraying several inches to the left of the bike and move several inches off to the right before you let go of the trigger to avoid drips on the part you are painting. Think of it like the drive-through car wash where the spray start well before it actually hits your car.
Too little spray is better than too much, by the way - you can always adjust for more if needed. Check for the consistency of the paint, runs, etc. Runs can mean you are too close or need to adjust the material flow (knob) or air pressure. A good spray out pattern looks solid in the middle with dots becoming more pixelated as you look outward - it looks more blurry than dotty around the edges. Keep adjusting and testing your spray gun until you are happy with the droplet size. You will need to check your spray pattern every time you spray.

How To Paint Your Chopper or Motorcycle Part 5:
- Clean Again
Using 400 grit sandpaper, wet sand the surface area thoroughly until it loses its glossiness.
Motorcycle Graphics and Art For Your Bike!

Here's the fun part. The designs and patterns you choose to paint are going to most likely be the most visible form of your personality.
Tape out your pattern or lay out your stencil. Mask off the areas on which you do not want paint completely so that no paint has a chance of getting on them.
Using a variety of sizes of automotive-quality masking tapes and papers will help you a great deal in this process. Never use regular masking tape, as it sticks too firmly and can leave a sticky mess behind that will affect your paint finish.

Whenever you want to paint in finer detail, use your airbrush. For both the airbrush and the spray gun, avoid using a diaphragmatic compressor, as it can "hiccup" and cause a bad finish. Use a compressor that provides a steady flow of pressure, like an automatic reservoir compressor.

Before you start airbrushing your design, make sure that you have the confidence that only comes from practice. If you feel that you need more practice, go back to your aluminum flashing and work on your technique and design variations until you are very comfortable with the process.

To use the airbrush, hold it in your hand like you would a pen with your forefinger on the trigger. Make a light circle or loose fist with your left (or supporting) hand, and rest your right (or painting) hand lightly on it. This will help you keep a smooth, steady line. Use the AMP painting technique: Air, Motion, Pull trigger.
Your distance from the object you are painting controls the size of your line. Refer to the manufacturer's instructions for more details on using your airbrush. When practicing, start by creating geographic shapes - lines, squares, circles, triangles. Move on to making larger shapes with varied shading within until you have mastered a consistent stroke.
When airbrushing, follow many of the same techniques you use with the spray gun - on a smaller scale. As with the spray gun, start spraying before you hit the target area, run smoothly across the area you wish to paint and then fully off of it before letting go of the trigger.

Use a light touch near the masked-off areas to ensure that the paint does not clump, run, or create a ridge.
Every time you change paint color, clean the airbrush. Use water with a little Palmolive and spray it through, then use plain water to finish. Keeping your airbrush clean will save you a lot more time than it takes to clean it. After you have cleaned it a couple of times, you will probably find the process to be simple and routine.
Apply your design. Let it dry. Remove the tape. If you are creating flames or anything that requires outlining, wet sand the edges of your design using a sanding block and 800 grit paper, wipe off all residue very carefully, then outline. Clean again.

- Stencils
You can make your own stencils with products like Mightyshield Stencil, a clear material made of acetate that you can custom cut with a hobby knife or stencil burner. Get a stencil burner if you plan to make your own stencils - it makes for a cleaner, faster-made stencil.
- Stickers, decals, and vinyl masks
You can also have a vinyl mask made from your own design. Check with your local custom auto and motorcycle shops for this service. Vinyl masks are applied just like decals, using a decal spreader or a rubber sanding block. They work much like a stencil - you fill it in with paint, let it dry, then peel it away. Allow at least ten to twenty minutes for drying and then remove all the tape. Peel the tape diagonally away from the painted edge to avoid uneven edges. It is better to remove the tape sooner rather than later, because the paint will have an opportunity to smooth out along the edges as it cures.
- Wet Sand
Wet sanding is the next step after the paint of your design has fully dried.
- Clear Coat
You can go ahead and apply your first coat of clear once you finish your design and wet sand. Make sure you clean thoroughly before you start laying the clear coat.
Allow the first clear coat to fully dry and then sand it carefully with 1500 grit sandpaper, finishing up with 2000 grit for a very smooth finish. The number of clear coats you decide to use is up to you. Just make sure that each coat is dry (one to three hours) before you try to wet sand or add another.
- Engine
Aluminum - use Nyalic or other clear coat designed for aluminum and high temperatures.
- Sand again
Once you have added the clear coats and achieved the look you want, wet sand one more time with 2000 grit sandpaper. This allows you to sand with a light touch - almost like buffing - and work toward a smooth, deep finish.
Finish and Polish Your Parts And Make Them Stand Out!

You can obtain a good finishing compound from your local auto parts store. Follow label directions for a fine finish, and here are some pointers for specific materials. Your goal with finishing is to remove all signs of grit marks from the sandpaper and create a high, glossy mirrored finish.
- Clean Again
Cleaning after polishing removes any sign of residue. Just use a mild cleaning solution and make sure it dries thoroughly. Your cleaning rag needs to be fresh, clean, and totally clear of any residue as the smallest particle can mar your hard-earned paint job.

Closeup of finished design - tank side
- Buff it out
You can use polishing compound on a wool pad for a smooth finish to your paint job, swirl remover with a foam pad, etc. Buffing refers to using a non-aggressive technique to smooth, not sand, out the final paint job.
Industry experts and amateurs alike refer to Meguiar's products as the way to go for polish, glaze, and more. Visit www.meguiars.com for more information and helpful tips.

You have probably found by now that custom painting your chopper is a planning-intensive project with high rewards.
